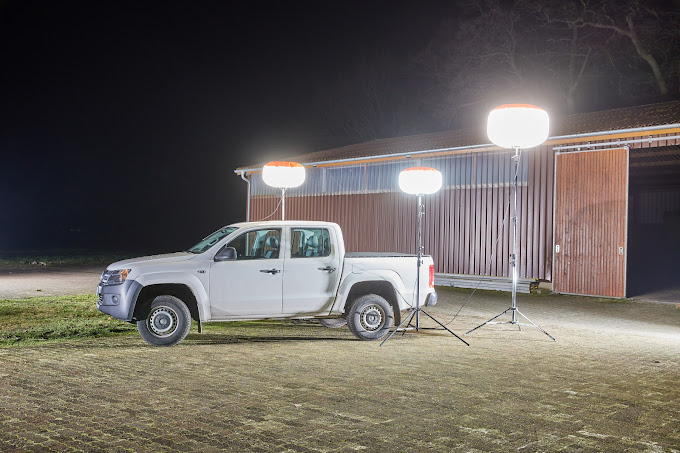
When I was first asked to buy lighting equipment for a project, I thought all balloon lights were the same. I looked at the price, picked the cheapest one, and called it a day. That turned out to be a big mistake. The light was too weak, the balloon kept sagging, and the whole thing gave out after two nights. I’ve since helped dozens of people pick the right air light balloon1—and I’ve learned how much the right choice depends on the job.
Let me walk you through how I help others decide which model suits them best.
Step 1: Understand Your Primary Use

Start with a clear answer to one question: what will you use the light for?
Some common goals I’ve seen:
- Lighting a construction site
- Supporting emergency response work
- Setting the mood at a wedding
- Providing even light for a film shoot
- Guiding crowds at outdoor events
Each of these needs a different setup. A rugged 800W unit makes sense for a dusty bridge repair job. But it’s overkill for a garden reception with fairy lights.
Step 2: Consider the Environment
Will the light be used indoors or outdoors? Will it face rain, wind, or dust? I’ve seen people buy indoor units and take them to job sites in the mountains. They don’t last. Make sure the light has at least IP542 for outdoor use—and IP65 if you expect bad weather.
Also ask:
- Will it be on flat or uneven ground?
- Will it need to be moved during use?
- How far away is the power source?
If you’re working far from power, consider a battery-powered or generator-ready model. If you’ll move it often, make sure it’s compact and can be set up by one person.
Dive Deeper: Adapting to Real-World Conditions

Jobs never go exactly as planned. I once brought a standard balloon light to an outdoor concert. The forecast said clear skies, but rain hit halfway through. The model had no proper seal. Water got inside the diffuser, and the LED shorted out. I had no backup. I had to explain to the client why half their event space went dark. Since then, I always ask vendors for test reports and weather ratings. No matter how good the specs look, the real world has a way of testing your gear.
Step 3: Choose the Right Brightness
For small spaces, 250–400W LED is enough. For larger areas or sites with no other light, go with 600W–900W. Always ask how many lumens the unit delivers. A good 600W unit should give you 40,000–60,000 lumens3 of clean, diffused light.
Also consider balloon size. Bigger balloons give softer and wider light. But they also need more air, stronger poles, and more power.
Step 4: Decide on Control Features
Here’s a simple guide:
- Remote only – Best for quick, low-tech jobs
- APP control – Good for events, color mixing, and groups of lights
- DMX – Ideal for filming, syncing with music, or large shows
If you don’t need color control or dimming, stick with remote. It saves money and setup time. If you’re running light cues or fading in scenes, go with DMX.
I once helped light a runway show. The client originally chose basic remotes, but we upgraded to APP control the night before. That let us sync the lights with music. The crowd didn’t notice, but the client sure did. It made the whole show feel tighter and more professional.
Step 5: Check Setup and Storage Needs
Not every model is made for daily use. Some are bulky. Some need tools. I always recommend lights that come in a carry case with wheels and don’t require more than 10 minutes to deploy. Also check:
- How long it takes to inflate
- If the tripod can be extended by one person
- How easy it is to change light settings on-site
Dive Deeper: Thinking About the Team Using It
I’ve worked with crews of all skill levels. What works for one team can frustrate another. At one emergency training event, the organizers rented a balloon light with a custom controller. No one could figure it out. They had to call the vendor for help in the middle of the drill.
Now I always ask who will use the light. If it’s a team that rotates weekly or includes volunteers, go simple. If you’re working with film crews or lighting techs, then high-end control features make sense.
Step 6: Set a Budget That Matches Your Needs
Everyone wants to save money. But buying too cheap usually means giving up on light quality or durability. I suggest setting your budget by how often and how long you’ll use the light.
Here’s my general advice:
- Under $1,000: Entry-level balloon lights with basic features
- $1,200–$1,600: Mid-range units with strong LEDs and app/remote control
- $1,700+: Premium lights with DMX, RGB, strong weatherproofing, or full battery systems
If you use the light more than six times a year, it's worth going mid-range or higher.
Conclusion
Choosing the right air light balloon1 isn’t about getting the biggest or most expensive one. It’s about matching features with your real-world needs. I’ve made mistakes in the past, and I’ve seen others do the same. But when you choose carefully, you get lighting that works better, lasts longer, and keeps your team or event safe and comfortable. For your next job or event, make the light work for you—not the other way around.
-
Explore this link to discover top-rated air light balloons that suit various job site needs, ensuring optimal performance and reliability. ↩ ↩
-
Understanding the IP54 rating is crucial for selecting durable outdoor lighting. This link will clarify its significance and applications. ↩
-
Learn about lumens and their impact on lighting effectiveness. This resource will help you choose the right brightness for your needs. ↩


